Bathysmal Rise (Hard Mode) Guide
TERA FORUMS :: TERA Guides :: Dungeons
Page 1 of 1
![]()
 Bathysmal Rise (Hard Mode) Guide
![]() by Admin Tue Aug 25, 2015 2:34 pm
by Admin Tue Aug 25, 2015 2:34 pm
Level Requirement: 65
Gear Requirement: This dungeon can be done with +12 Devastator or better with a co-ordinated group.
Item level: 181
Format: 5-man
----------------------------------------------------------------------------------------
This dungeon uses the Beginner Support System (Boons) which occurs 3 times. This will fully recover your HP/MP, grant you a 10-second shield making you immune and a free resurrection if you were dead.
----------------------------------------------------------------------------------------
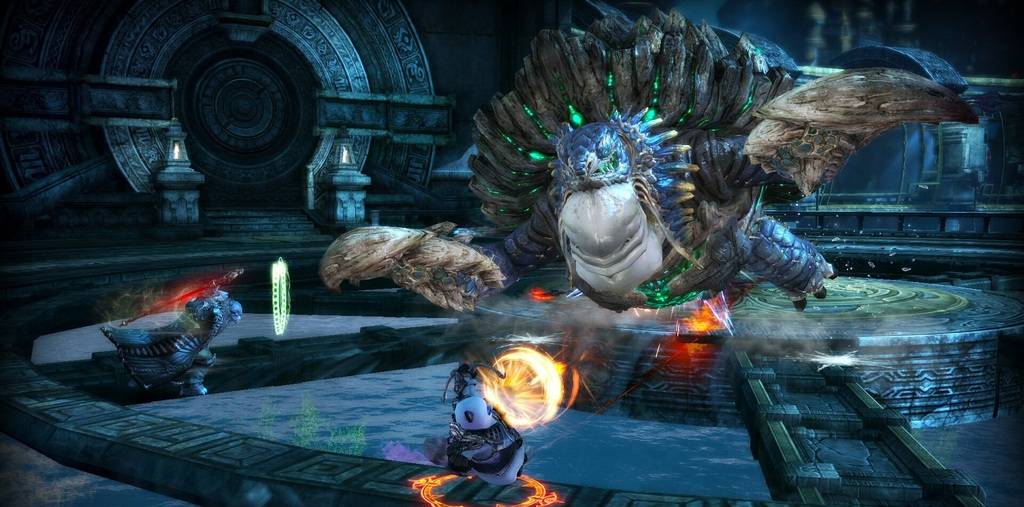
First Boss: Nightmare Mephisis
Drops:
Discovery Boots
Tier 6 Alkahest & Feedstock
Tanking Tip:
The tank should aggro the boss towards the north wall, in between the rocks. You will be pushed a lot.
Important/Notable skills to watch out for:
Mechanic #1 - Poisonous Gas:
In hard mode, both rocks will now scatter but they will not scatter at the same time.
Note: The poison wave occurs at a faster pace now.
Mechanic #2 - Poisonous Breath:
Mephasis will spit poison towards a player, if hit you'll receive damage and a poison debuff which drains 8% HP per second - can be cleansed.
Other than these new mechanics, rest of his attacks are the same as NM.
----------------------------------------------------------------------------------------
Pathway #1
This pathway is the same as normal mode except it is recommended (if this is your first run) to grab the first mobs (jellyfish/starfish) and bring them back to the same direction you came from and then take the BAM.
----------------------------------------------------------------------------------------
Second Boss: Nightmare Tantibus
Drops:
Tier 6 Alkahest
Discovery Armor
Discovery Belt
Titan's Ember
Etching III Designs

Important/Notable skills to watch out for:
Mechanic #1 - Phenric Slime:
This is the skill where the fish places a circle around a player and leaves a green circle that grants you a MP draining debuff, but in hardmode these circles stay on the ground for 1 hour, therefore you must place these wisely on the ground to make the fight easier.
Mechanic #2 - Water Wall:
This is the wall that appears around the central healing pool where you cleanse the MP draining debuff.
A message will appear indicating when the barrier appears around the pool "Clean water fills the pool" but in HM, the barrier will have a lot more HP compared to NM so it is wise to deal with the barrier first.
Mechanic #3 - Crossed Waves:
During the fight, the pool will overflow. The room will split into danger and safe zones, if hit, you will be flung to the edge of the map and recieve 40,000 damage. (Danger zones are highlighted with a blue watery effect)
Other than these new mechanics, rest of his attacks are the same as NM.
----------------------------------------------------------------------------------------
Minigame: Triune Heart
This is the minigame with the 4 orbs at North/East/South/West around a bell in the middle (same as normal mode - still need confirmation if you can glitch it like in NM)
----------------------------------------------------------------------------------------
Pathway #2
This pathway is the same as normal mode. (You can't reset these mobs)
----------------------------------------------------------------------------------------
Final Boss: Nightmare Fulminar
Drops:
Crystal Box
Tier 6 Alkahest/Enchantment Stones
Discovery Gloves
Master Enigmatic Scroll
Discovery Weapon
Generation Vision Document
Cracked Rune (PvE Visionmaker Material)
Bathysmal Fish Scale (PvE Visionmaker Material)
Blacksmith's Ember (PvE Visionmaker Material)
Level 65 Superior Brooch Design
Rare and Superior Purifying Brooch
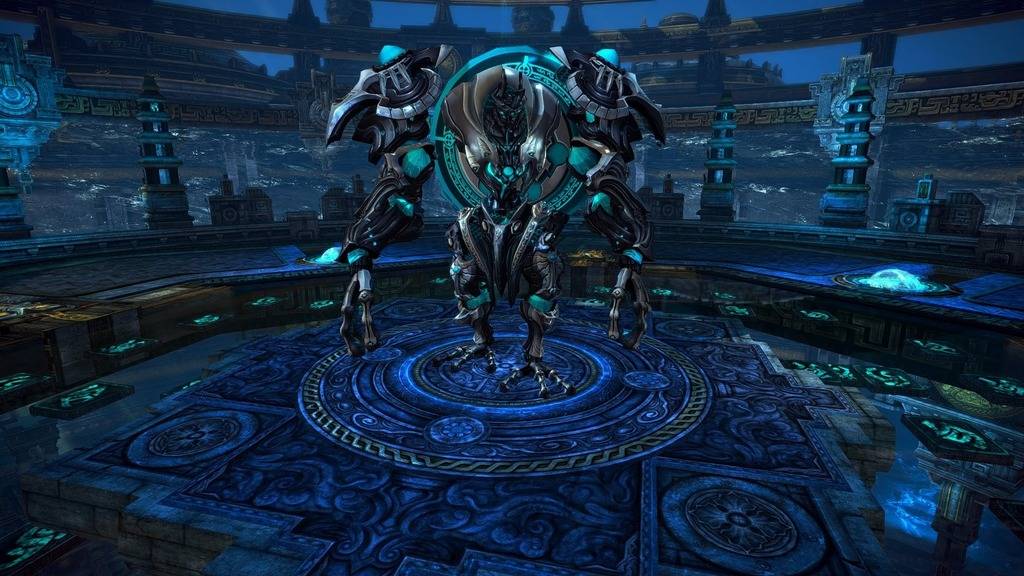
Tanking Tip:
The tank should aim to allow the bosses back be exposed without making the DPS, DPS against the wall and leave them vulnerable. You may want to tank the boss in a circle to avoid being walled as much. Walling is fine, however the tank may be pushed to the side causing the DPS to be against the wall if they want to back crit.
Important/Notable skills to watch out for:
Mechanic #1 - Buzz Mode:
At 90%, 60%, and 30%, a message will appear ("Let's cut you down to size") and the boss will disappear to summon its 4 clones from the random outer edges of the room. Avoid the path as this is a 1-shot mechanic.
The blue/orange zones are no longer secure safe zones.
The red lines will not appear.
The cutters will leave a damage path on the ground, standing in this will deal 30,000 flat damage over time if you stand on it.
Mechanic #2 - Floodwaters:
The boss will disappear and you will be notified with the message: "Water rushes into the chamber." which will require you and your whole party to run to the centre, after a red circle appears, you will be pushed outwards in whichever direction inside the circle you are standing but in hard mode, when pushed you will be debuffed with a damage over time (12% per 3 seconds) which can be cleansed.
Mechanic #3 - Lightning Shield:
When you receive the message "Fulminar prepares to strike a final blow", this is his shield phase in which you will have to go ham on DPS to destroy it, failure to break the shield will result in you receiving a damage over time debuff (12% per 3 seconds) that can be cleansed.
Mechanic #4 - Gift of Annihilation:
Gift of Annihilation (Part 1 - Same as normal mode): You will be notified, as the boss will warn your party with: "I bring you the gift of annihilation."
You will need to get inside the circle cage quickly. If you are outside when the cage has been formed, you will get one-shot. Do not resurrect until this phase is over or else you'll die outside the cage again. The boss will then carry out part 2 of this mechanic.
Gift of Annihilation (Part 2): The boss will spin and the floor inside the cage will split into different zones. These zones will alternate between red (unsafe) and non-red (safe) zones. Avoid the red circle patterns to avoid being killed. It'll then jump up in the air and crash down; breaking the cage.
Mechanic #5 - Despair:
Fulminar will enrage below 20%, this will cause his attack speed and power to dramatically increase. Cannot be cleansed and will remain till Fulminar's death... or yours.

Admin- Admin

- Posts : 10
Join date : 2015-07-08 -

![]()
![]()
![]()
TERA FORUMS :: TERA Guides :: Dungeons
Page 1 of 1
Permissions in this forum:
You cannot reply to topics in this forum|
|
|